


These basic mashed potatoes are a timeless side dish that’s the cornerstone of so many American meals. I’ve been making this exact recipe for years, and it never fails to deliver that perfect, creamy, comforting bite. What makes it special is the focus on technique and a few key ingredients that guarantee fluffy results every single time. Once you nail this foundational method, you’ll have a go-to side that can be dressed up or down for any occasion, from a casual weeknight to a holiday feast.
Why You'll Love This Recipe
- You’ll get a luxuriously creamy texture that’s never gluey
- The method is simple but packed with smart technique for perfect results
- It’s ready from start to finish in under 40 minutes
- You can easily add your favorite mix-ins like cheese or herbs
- I make this exact recipe nearly every Sunday
Ingredients You’ll Need
- Yukon Gold potatoes: Their naturally buttery flavor and creamy texture make them the gold standard for mashing, plus they hold just the right amount of moisture so you get fluffy results every time.
- Kosher salt: You’ll use it for seasoning the boiling water and the finished dish; its coarse grains dissolve perfectly and season the potatoes from the inside out.
- Unsalted butter: This is your flavor foundation, melting into the warm potatoes to create a rich, silky base and letting you control the final salt level.
- Whole milk or heavy cream: Warming this before adding it keeps the potatoes from cooling down and becoming gummy, and it creates that signature smooth, creamy consistency.
- Freshly ground black pepper: A touch of this adds a subtle warmth and complexity that cuts through the richness, and freshly cracked makes all the difference.
- Garlic powder: It gives a gentle, mellow garlic flavor that’s evenly distributed without any risk of harsh, raw garlic bites in your final dish.
- Sour cream: This secret ingredient adds a lovely tang and incredible richness, making the texture extra luxurious without being heavy.
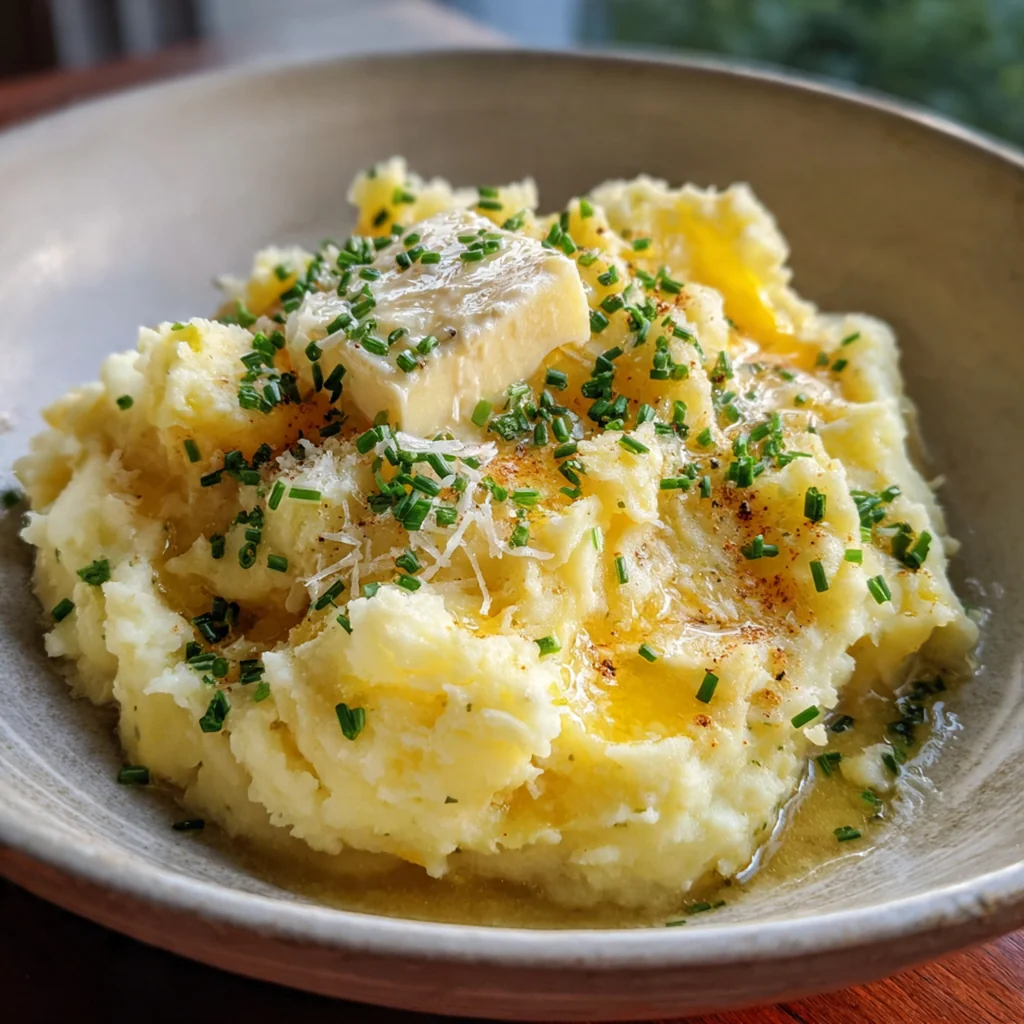
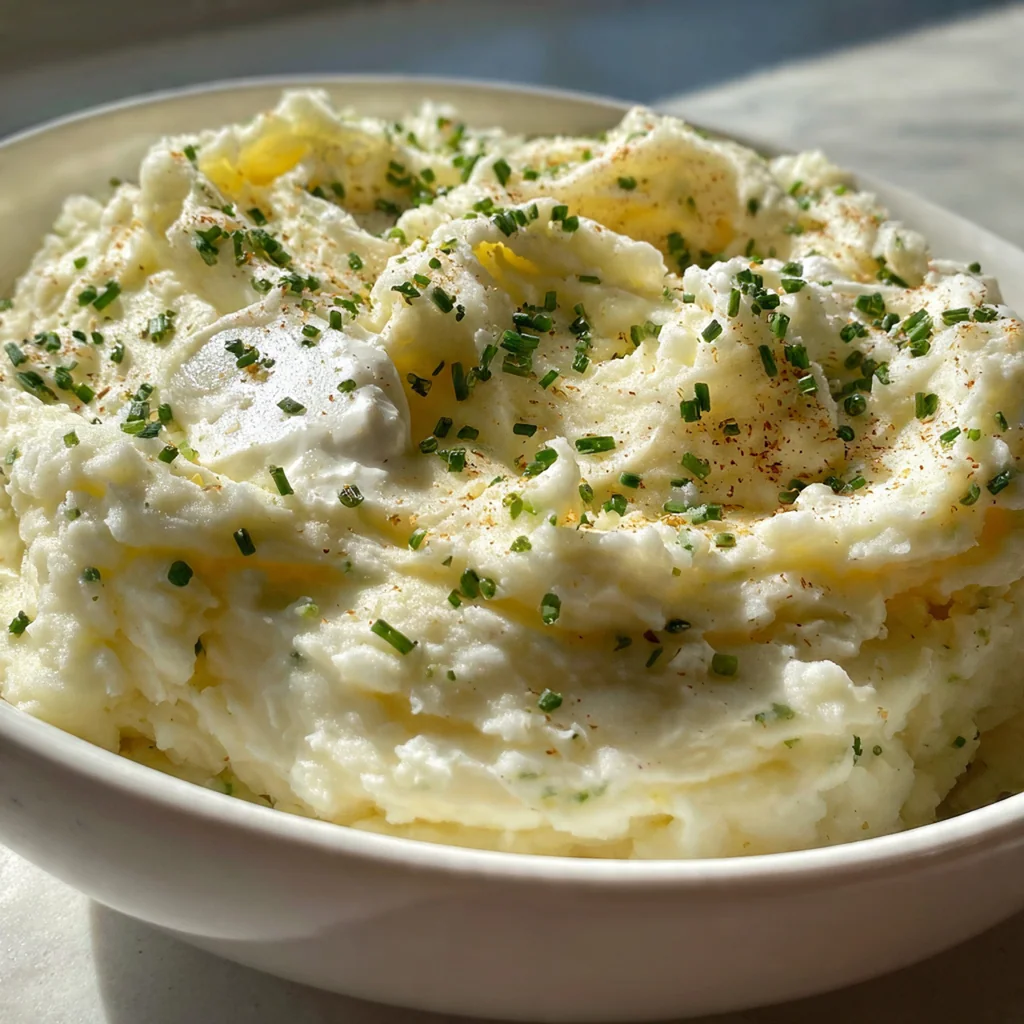
- Fresh chives: They provide a pop of color and a fresh, mild onion flavor that brightens up the whole bowl, making it look and taste restaurant-quality.
- Grated Parmesan cheese (optional): Stirring this in at the end adds a salty, nutty depth that’s fantastic if you’re looking for something a little more decadent.
How to Make It
Prepare Your Potatoes:
Peel all the potatoes and cut them into uniform one-inch chunks. Keeping them the same size is crucial because it means every piece will cook at the exact same rate, preventing some from turning to mush while others are still hard.
Boil Them Gently:
Place the potato chunks in a large pot and cover them with cold water by about an inch, then stir in that first tablespoon of kosher salt. Starting with cold water helps them cook evenly from the outside in. Bring it to a boil, then immediately lower it to a steady simmer and cook until they’re completely fork-tender.
Drain and Dry Thoroughly:
Pour the cooked potatoes into a colander and let all the hot water drain away. Then, return them to the hot, empty pot and let them sit over low heat for a minute or two. This step is my non-negotiable secret for driving off any lingering steam and moisture, which is the enemy of fluffy basic mashed potatoes.
Warm Your Dairy Mixture:
While the potatoes are cooking, combine the butter and milk in a small saucepan over low heat. You just want to warm it until the butter melts and the mixture is steaming slightly; boiling it can cause the milk to scald or separate. Taking this minute ensures your mash stays warm and absorbs the liquid beautifully.
Mash to Your Preferred Texture:
Now, choose your weapon. For a rustic, chunky texture, use a standard potato masher and go to town. For the silkiest, smoothest basic mashed potatoes, a ricer or food mill is your best friend. If you’re using a hand mixer, be careful not to overdo it or you’ll release too much starch.
Combine and Season:
Pour that warm butter and milk mixture over your mashed potatoes. Add the sour cream, the second measure of kosher salt, the black pepper, and the garlic powder. Gently fold and stir everything together until it’s fully incorporated and looks gloriously creamy.
Taste and Adjust:
This is the most important part. Grab a spoon and taste your creation. Does it need more salt or pepper? If the consistency seems a bit too thick for your liking, just stir in another splash of warm milk until it’s exactly how you want it. Trust your palate here.
Serve Immediately:
Transfer your perfect basic mashed potatoes to a warm serving bowl. Top them with the finely chopped fresh chives and that optional extra pat of butter, which will melt into a little pool of goodness right on top. They’re best served straight away while they’re hot and fluffy.
You Must Know
- Always start your potatoes in cold, salted water
- Warm your dairy before adding it to the mash
- Let the drained potatoes steam dry in the hot pot
- Don’t overwork them if you’re using a mixer
- That splash of sour cream is a total game-changer
Storage Tips
Store any leftover basic mashed potatoes in an airtight container in the fridge for up to five days. They’ll thicken up as they cool, so when you reheat them, do it gently in a saucepan over low heat with a splash of milk or cream, stirring often. You can also reheat them in the microwave in 30-second bursts, stirring and adding a touch of liquid each time. I don’t recommend freezing them, as the texture can become a bit grainy and watery upon thawing.
Ingredient Substitutions
If you don’t have Yukon Golds, Russet potatoes are a classic choice; just know they’ll be a bit fluffier and absorb more liquid. You can swap the whole milk for half-and-half or even buttermilk for a tangier kick, and the sour cream for an equal amount of cream cheese or Greek yogurt in a pinch. For a dairy-free version, use your favorite plant-based butter and unsweetened, unflavored oat or almond milk. The fresh chives can be replaced with thinly sliced green onions or a sprinkle of dried chives, though the fresh ones really are best.
Serving Suggestions
These basic mashed potatoes are the ultimate partner for a classic roasted chicken or Thanksgiving turkey, especially when smothered in rich gravy. For a weeknight dinner, they’re fantastic next to a simple meatloaf, pan-seared pork chops, or a juicy grilled steak. To dress them up, swirl in some caramelized onions, crispy fried shallots, or a handful of that optional Parmesan cheese right before serving. I also love them as a bed for saucy dishes like braised short ribs where they soak up every delicious drop.
Cultural Context
Mashed potatoes hold a beloved place in American comfort food, a humble side that’s been graifying family tables for generations. Their roots stretch back to England and Ireland, where potatoes were a staple, but the American version, enriched with butter and cream, became a celebration of abundance and home cooking. They’re a fixture at holidays and Sunday suppers alike, symbolizing warmth, comfort, and simple, satisfying nourishment. Mastering this basic recipe connects you to that long tradition of turning a few simple ingredients into something truly special and universally loved.
Pro Tips
- Use a potato ricer for the smoothest, most restaurant-quality texture
- Simmer the milk with a sprig of fresh thyme or rosemary for an herby infusion
- For ultra-decadent potatoes, replace the milk with warmed heavy cream
- Letting the potatoes steam dry after draining is the key to avoiding wateriness
- I always save a little extra butter to melt on top right before serving
Frequently Asked Questions
Yukon Gold potatoes are ideal for these Basic Mashed Potatoes because they have a naturally buttery flavor and creamy texture when mashed. They hold just enough moisture without becoming gluey, giving you perfectly fluffy results every time. Russet potatoes can also be used but may require more butter or cream.
Absolutely! You can make Basic Mashed Potatoes a day ahead. Transfer them to a baking dish, smooth the top, and dot with extra butter. Cover and refrigerate. Reheat in a 350°F oven, covered, for 30-40 minutes, stirring halfway and adding a splash of milk if needed to refresh the creamy texture.
If you don’t have sour cream, Greek yogurt is an excellent 1:1 swap in these Basic Mashed Potatoes. Alternatively, you can use extra cream cheese, a bit more butter, or simply increase the amount of whole milk or heavy cream to achieve the desired creamy consistency.
Your Basic Mashed Potatoes are ready when the potato chunks are fork-tender, which usually takes 15-20 minutes of boiling. They should offer no resistance when pierced. Be careful not to overcook them, as they can absorb too much water and become soggy, making your final dish less flavorful.
These classic American Basic Mashed Potatoes are the perfect side for roast chicken, meatloaf, holiday turkey, or grilled steaks. They’re also fantastic with gravy, meatballs, or as a comforting base for stews. Their creamy, neutral flavor makes them incredibly versatile for any meal.