

This White Chocolate Peppermint Pie is the showstopper you need for your holiday table, a stunning no-bake dessert that comes together without ever turning on the oven. It’s all about that creamy, cool filling with the perfect peppermint kick, nestled in a chocolate cookie crust. It’s become my go-to because it’s a stunning, make-ahead American classic that wows a crowd with minimal effort. The combination of silky white chocolate and refreshing mint feels both festive and completely irresistible.
Why You'll Love This Recipe
- It’s a stunning, make-ahead dessert that impresses everyone
- The flavor is perfectly balanced—creamy white chocolate with a cool, refreshing peppermint kick
- You don’t need to bake it, which is a lifesaver when the oven is busy
- The texture is dreamily light and creamy, not heavy at all
- I make it every December and it’s always the first dessert to disappear
Ingredients You’ll Need
- Chocolate cookie crumbs: Use the filling-removed cookies from a classic sandwich cookie for that perfect cocoa crust, just pulse them in a food processor until fine for the best texture.
- Unsalted butter, melted: This binds the crumbs into a firm, pressable crust; melting it first ensures every crumb gets coated so your base holds together perfectly.
- High-quality white chocolate, finely chopped: A good baking bar melts smoothly and gives a rich, creamy flavor; avoid chips which often contain stabilizers that can make the filling grainy.
- Whole milk: This helps bloom the gelatin and adds a touch of creaminess to the filling base without thinning it out too much.
- Unflavored gelatin powder: The secret weapon that sets the filling without baking, giving you a sliceable pie that’s still incredibly light on the tongue.
- Full-fat cream cheese, softened to room temperature: The foundation for that tangy, velvety texture; full-fat is non-negotiable for stability and the richest mouthfeel.
- Granulated sugar: Sweetens the filling and balances the tang from the cream cheese, creaming it together first makes the texture perfectly smooth.
- Pure peppermint extract: Go for the real stuff for a clean, refreshing mint flavor that won’t taste medicinal; a little goes a long way.
- Red gel food coloring (optional): Just a tiny drop gives that classic pink holiday hue; gel coloring is potent and won’t water down your filling.
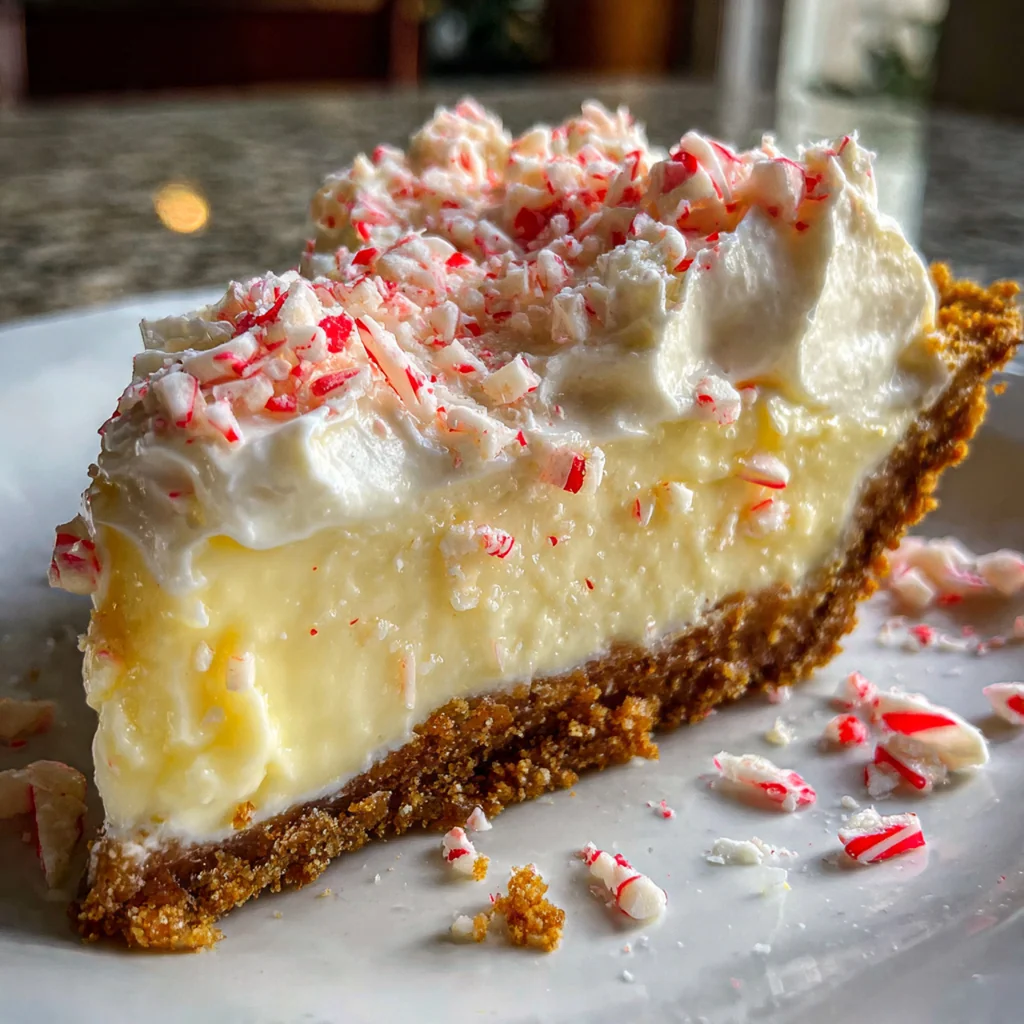
- Cold heavy whipping cream: You’ll whip this to stiff peaks to fold in, creating the pie’s airy, mousse-like texture; cold cream whips up much faster.
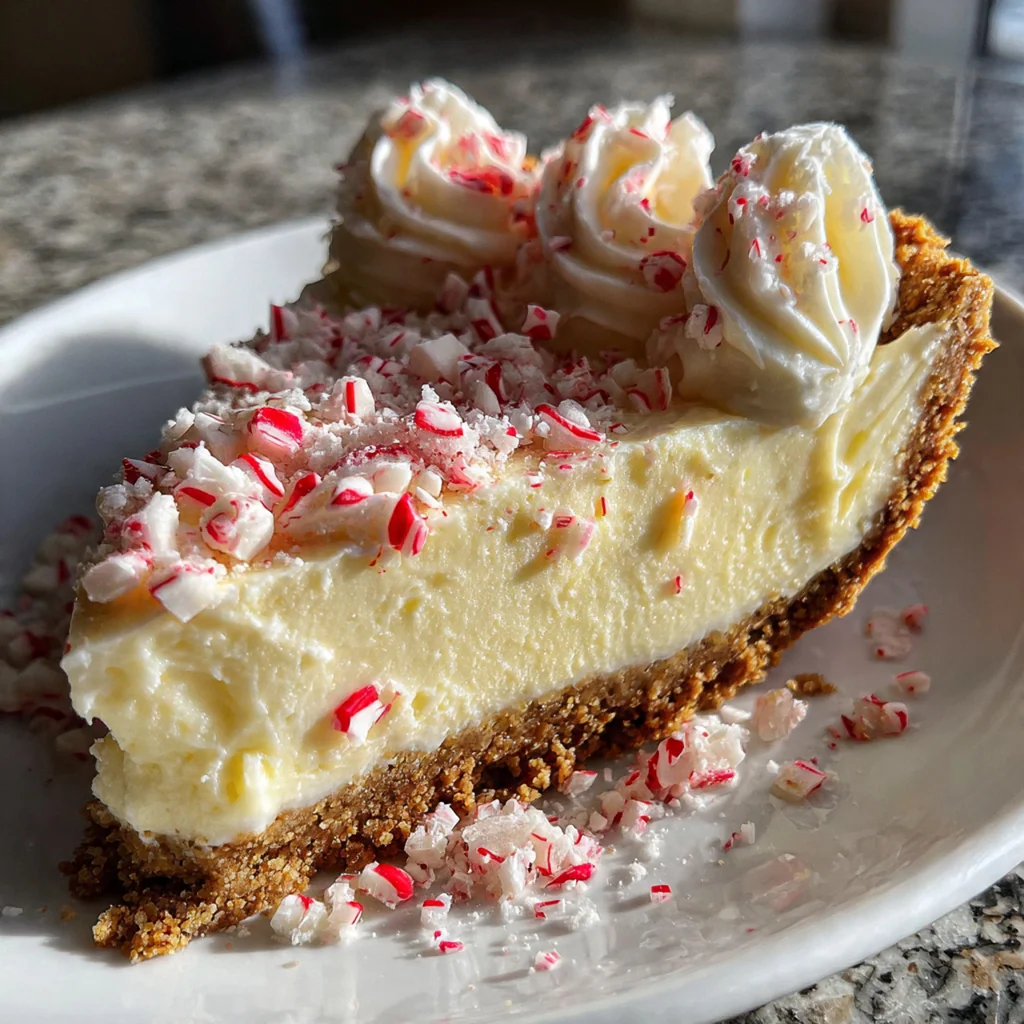
- Additional cold heavy whipping cream (optional): For a garnish, whip this with a touch of powdered sugar for pretty, stable piping on top of your finished pie.
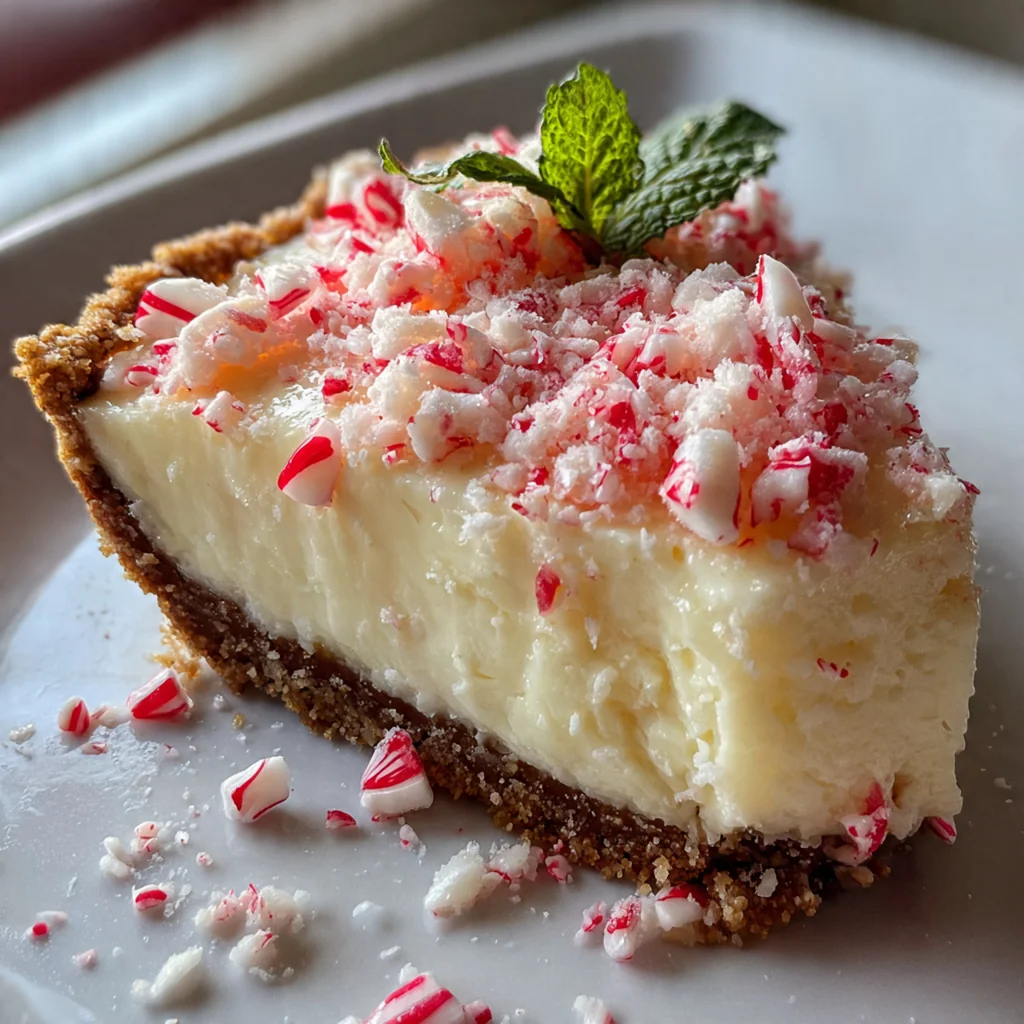
- Crushed candy canes or peppermint candies: The classic crunchy, festive garnish that adds a pop of color and extra peppermint flavor with every bite.
- White chocolate shavings: A simple, elegant finishing touch that looks beautiful and doubles down on that creamy white chocolate flavor you love.
How to Make It
Make the Chocolate Cookie Crust:
In a medium bowl, stir the chocolate cookie crumbs and melted butter together until it looks like wet sand. Press this mixture firmly and evenly into the bottom and up the sides of your pie plate—really pack it in so it holds its shape. Pop it in the fridge to chill and set while you make the filling; a solid crust is your foundation.
Bloom the Gelatin in Milk:
Pour your milk into a small saucepan and sprinkle the gelatin powder evenly over the surface. Just let it sit untouched for about five minutes. You’ll see the milk get a bit thicker as the gelatin granules absorb liquid and swell up; this is called blooming and it prevents lumps later.
Gently Melt Your White Chocolate:
While the gelatin blooms, place your finely chopped white chocolate in a heatproof bowl. Microwave it in short bursts, stirring well between each one, until it’s completely smooth. Let it cool for a few minutes so it doesn’t scramble the other ingredients when you mix it in.
Dissolve the Gelatin Mixture:
Now take your saucepan with the milk and bloomed gelatin. Place it over low heat and warm it gently, stirring constantly, for just a couple minutes until you can’t see any granules. The key here is low and slow—don’t let it boil or you might mess with the gelatin’s setting power.
Build the Cream Cheese Filling Base:
In a large bowl, beat the softened cream cheese and sugar together with an electric mixer until it’s completely smooth and creamy, scraping down the sides as needed. Beat in the peppermint extract and that optional drop of food coloring. With the mixer on low, slowly stream in the warm milk-gelatin mixture until it’s fully combined.
Incorporate the Melted White Chocolate:
Keep your mixer on low speed and slowly pour your slightly cooled, melted white chocolate into the cream cheese mixture. Beat just until everything is fully incorporated and you have a smooth, homogenous base. Don’t overmix here; you just want it combined before you add the whipped cream.
Whip the Heavy Cream to Stiff Peaks:
In a separate chilled bowl, beat the cold heavy whipping cream with clean beaters. Start on medium speed and gradually increase to high, watching closely until the cream forms stiff peaks that hold their shape when you lift the beaters. This adds all the lightness to your pie.
Fold Everything Together Gently:
Use a large rubber spatula to fold about a third of the whipped cream into the white chocolate mixture. This first addition lightens the base so the rest folds in easily. Then, carefully fold in the remaining whipped cream using a gentle, sweeping motion until no white streaks remain, keeping it airy.
Chill Until Completely Set:
Pour the completed filling into your prepared crust and smooth the top with your spatula. Cover the pie loosely with plastic wrap and refrigerate it for at least four hours, though overnight is really best. This long chill is what gives you those perfectly clean, beautiful slices.
Garnish and Slice for Serving:
Right before you serve, add your optional garnishes like piped whipped cream, a sprinkle of crushed candy canes, and white chocolate shavings. For the cleanest cuts, dip a sharp knife in hot water, wipe it dry, and slice with a smooth motion, cleaning the blade between each piece.
You Must Know
- A high-quality white chocolate bar makes all the difference for flavor and texture
- Your cream cheese must be truly soft to avoid any lumps in the filling
- Chill your bowl and beaters before whipping the cream for the best results
- I always make this pie the day before so it’s perfectly set and stress-free
Storage Tips
Once it’s set, you can cover your white chocolate peppermint pie tightly with plastic wrap or store it in an airtight container right in the refrigerator. It’ll keep beautifully for up to four days, though the chocolate cookie crust might start to soften a bit after the second day. I don’t recommend freezing this pie because the texture of the creamy filling and the crust can become grainy and separate once thawed, so it’s best enjoyed fresh from the fridge.
Ingredient Substitutions
If you need a gluten-free version, you can absolutely use your favorite gluten-free chocolate sandwich cookies for the crust—just remove the filling and crush them the same way. For the white chocolate, a good quality bar is ideal, but if you only have chips, look for ones labeled ‘good for melting’ or ‘coating’ to avoid graininess. In a real pinch, you could swap the chocolate cookie crust for a simple one made from graham cracker crumbs, though you’ll lose that deep chocolate flavor that pairs so well with the mint.
Serving Suggestions
This white chocolate peppermint pie is the perfect finale to a hearty holiday dinner like roast turkey or beef, where its cool, creamy texture is a wonderful contrast. Serve each slice with a cup of strong coffee or rich hot cocoa to balance the sweetness. For a festive brunch spread, it makes a fantastic sweet option alongside other treats, and its stunning appearance makes it the centerpiece of any dessert table you set.
Cultural Context
The no-bake pie is a beloved American dessert tradition, a testament to clever, convenient cooking that doesn’t sacrifice flavor or presentation. This particular white chocolate peppermint pie taps directly into the festive holiday spirit that sweeps the country every winter, where peppermint and creamy desserts become synonymous with celebration. It’s a modern classic you’d find at cookie exchanges and family potlucks, a dessert designed for sharing and creating sweet memories without keeping you tied to the kitchen on a busy holiday.
Pro Tips
- Let your cream cheese soften on the counter for a few hours for a lump-free filling
- Use a gentle folding motion to keep the whipped cream’s airy texture intact
- For clean slices, dip your knife in hot water and wipe it dry between each cut
- Decorating just before serving keeps the garnishes crunchy and pretty
- I always use a rubber spatula to press the crust into the pie plate—it’s the perfect tool
Frequently Asked Questions
For the best flavor and texture, use a high-quality baking bar of white chocolate, finely chopped. Avoid white chocolate chips, as they often contain stabilizers that can prevent a smooth melt. A good bar will give your pie a rich, velvety filling that sets perfectly.
Absolutely! This pie is an excellent make-ahead dessert. Prepare it fully, cover it tightly, and refrigerate for up to 2 days before serving. This actually allows the flavors to meld and the filling to set up firmly, making it easier to slice cleanly.
If you need a vegetarian option, you can substitute the unflavored gelatin powder with an equal amount of agar-agar powder. Note that agar sets more firmly and at a higher temperature, so follow the package instructions for dissolving and incorporating it into the filling mixture for the best results.
The pie is ready when it’s completely chilled and firm to the touch. After assembling, refrigerate it for at least 4-6 hours, or ideally overnight. You should be able to gently press the center without any give, and it will slice cleanly with a warm knife.
This pie is decadent on its own, but for extra holiday flair, top slices with a dollop of whipped cream, a drizzle of chocolate sauce, or crushed candy canes. It pairs wonderfully with a cup of coffee or hot cocoa after a big holiday meal.